Workflows and Safety
How the program fits into real work: the two main workflows, which command and which level to choose, what may leave your computer, and what a restore can and cannot give back.
1. The workflow in five steps
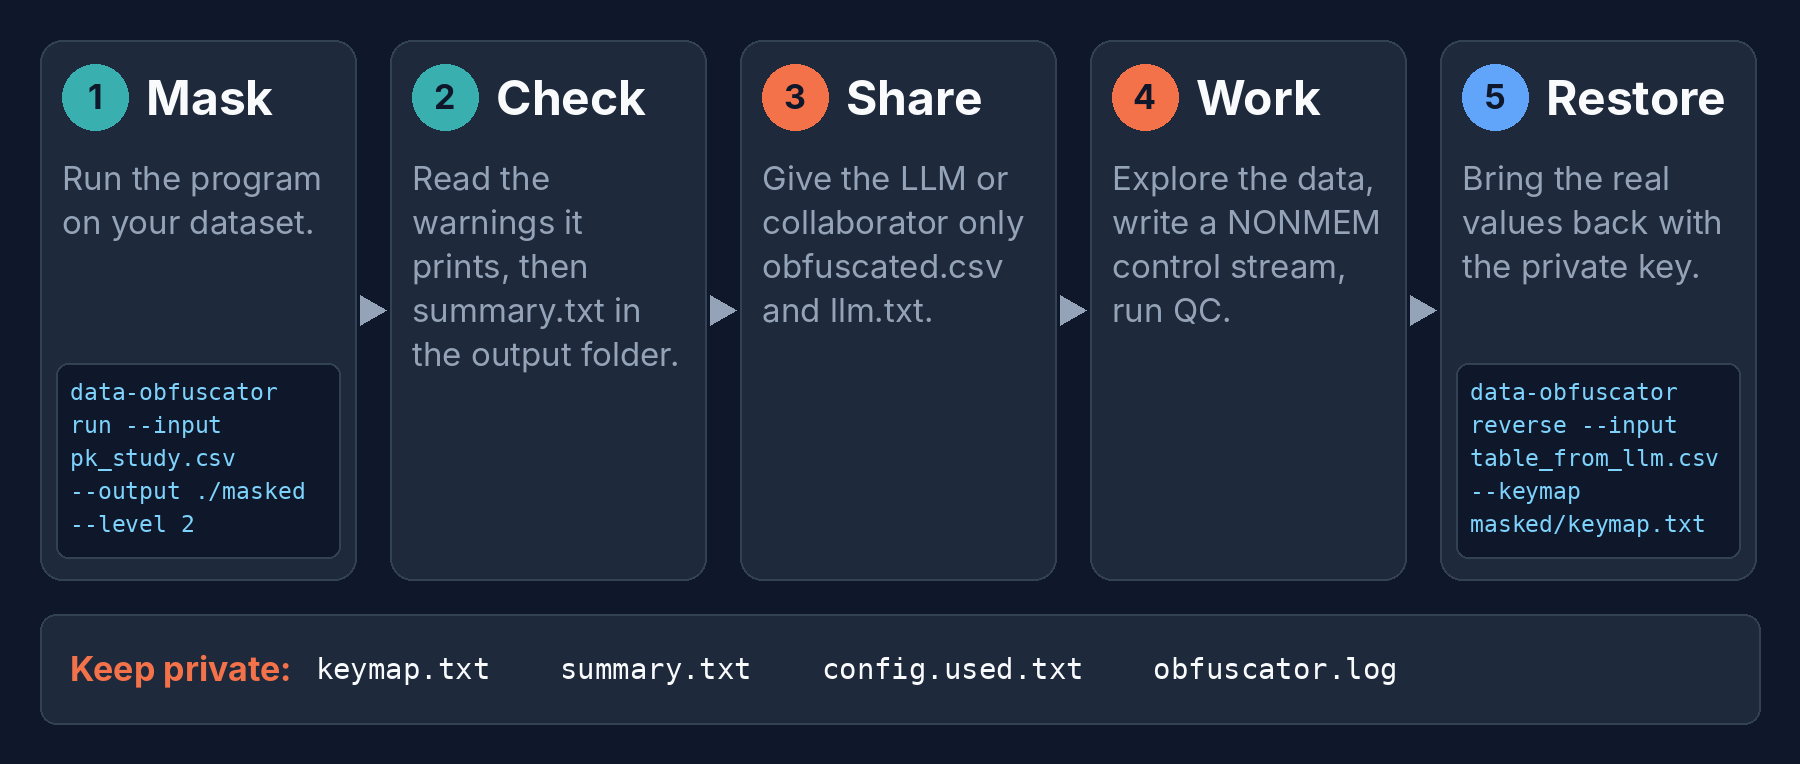
- Mask: run the program on your dataset.
- Check the warnings it prints, then read
summary.txtin the output folder. - Share only
obfuscated.csvandllm.txtwith the LLM or the collaborator. - Work on the masked data: exploration, a NONMEM control stream, QC.
- Restore with
reverseand the private key when you need the real values.
Workflow A: one dataset (run)
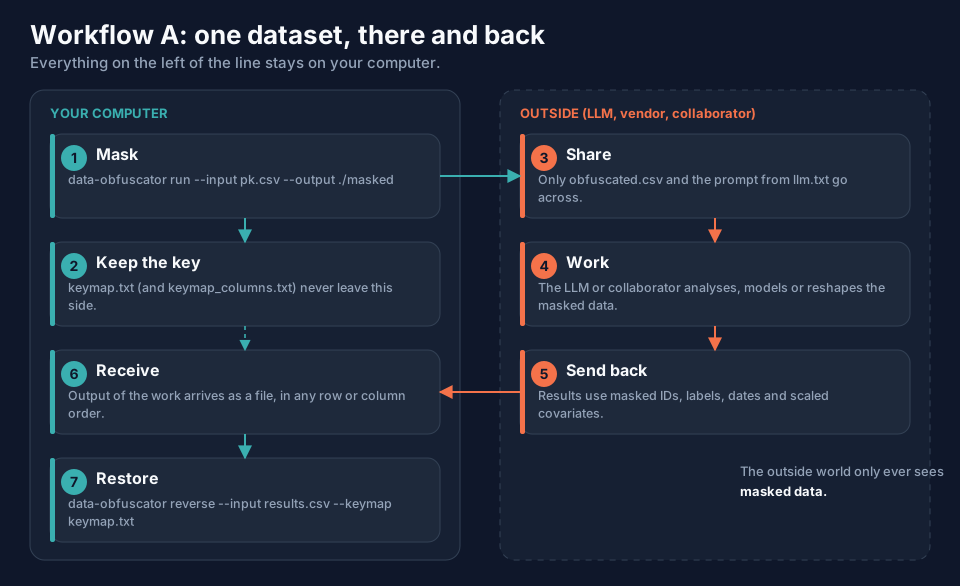
The key (keymap.txt) never travels. The table that comes back from the LLM may have new rows, a different row order
or only a subset of the columns: reverse restores whatever it can recognise.
Workflow B: several related datasets (run2)
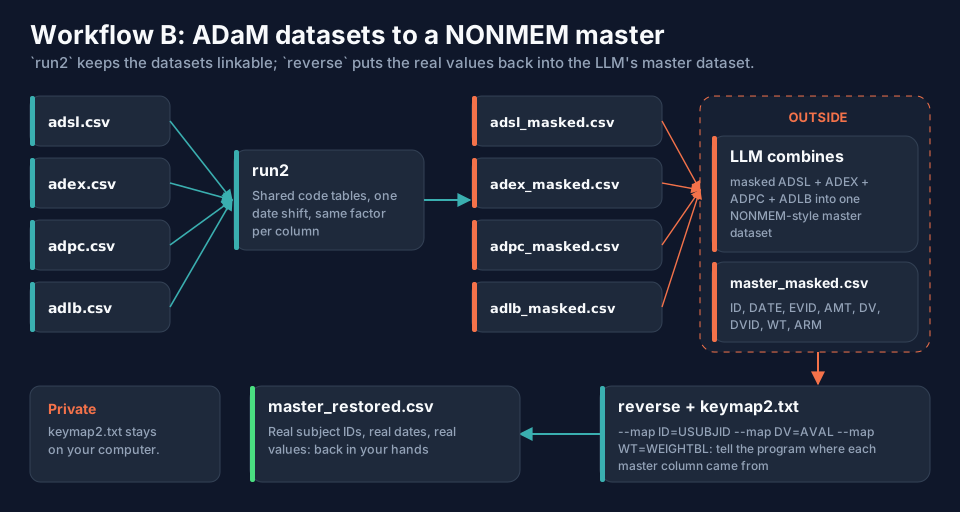
A common request is "combine my ADaM ADSL, ADEX, ADPC and ADLB into one NONMEM-style master dataset" without
leaking anything. run2 masks the datasets together, so the same subject has the same code in all of them and the
LLM can still join the files. The LLM builds the master dataset from the masked files; reverse puts the real values
back into the master dataset.
2. Which command? Which level?
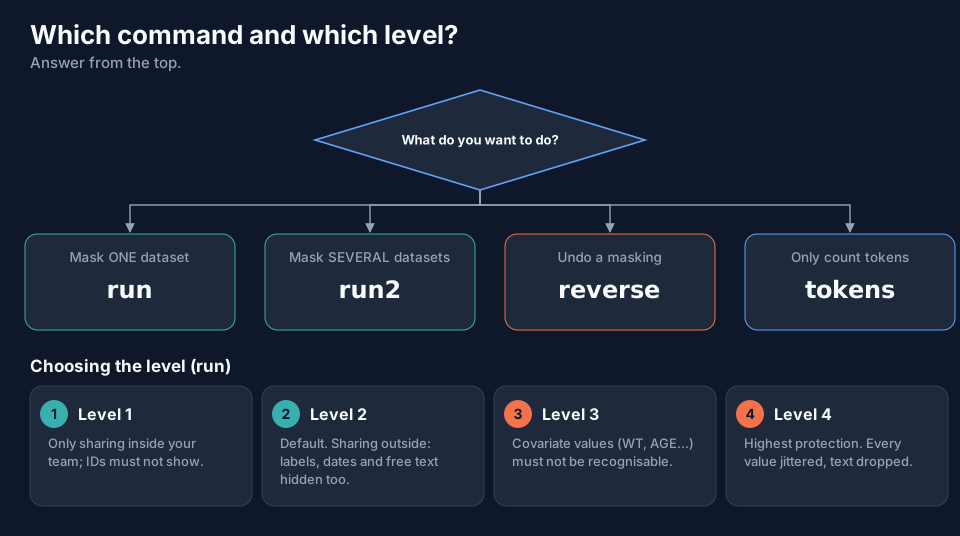
| You want to | Command |
|---|---|
| mask one dataset | run |
| mask several related datasets so an LLM can combine them | run2 |
| get the real values back | reverse |
| know how many tokens a file uses before you paste it | tokens |
| Level | Choose it when |
|---|---|
| 1 | the file stays inside your team and only the identifiers must not show |
| 2 | default: the file leaves your team; labels, dates and free text must go too |
| 3 | covariate values (weight, age, ...) must not be recognisable |
| 4 | highest protection: every value gets its own jitter, free text is dropped, rows are sorted |
3. What may leave your computer
The rule of thumb is short: the masked data and its prompts travel, the keys and the records stay at home.
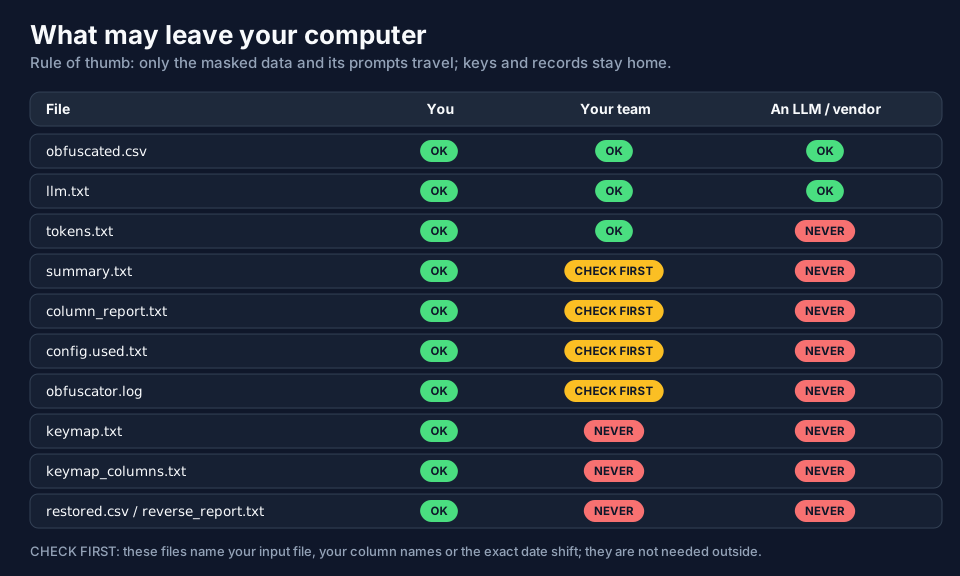
summary.txt, column_report.txt, config.used.txt and obfuscator.log contain no data records, but they name your
input file and your columns, and summary.txt and config.used.txt show the exact date shift and the seed. Treat them
as private. keymap.txt and keymap_columns.txt hold the real identifiers and every factor: whoever has the key and
the masked file can undo the masking.
4. What an outsider still sees
Masking is cumulative: each level hides what the one before it hid, and more. The figure was measured on the example dataset.
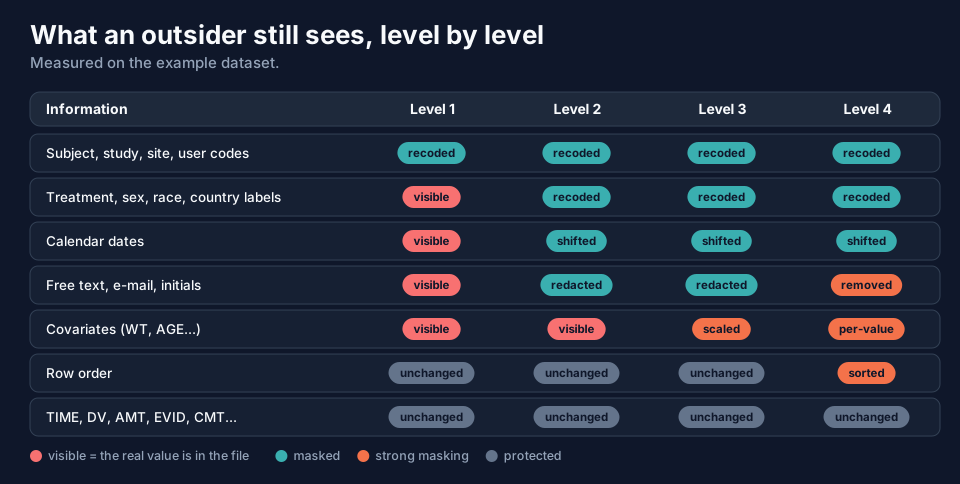
Notice the last row: whatever the level, TIME, DV, AMT, EVID, CMT and the other PK/PD columns are untouched.
That is the price of keeping the data analysable, and it is the reason masking is not formal anonymisation.
5. What a restore can and cannot give back
reverse is exact for most things, approximate for a few, and powerless for some. Know which before you rely on it.
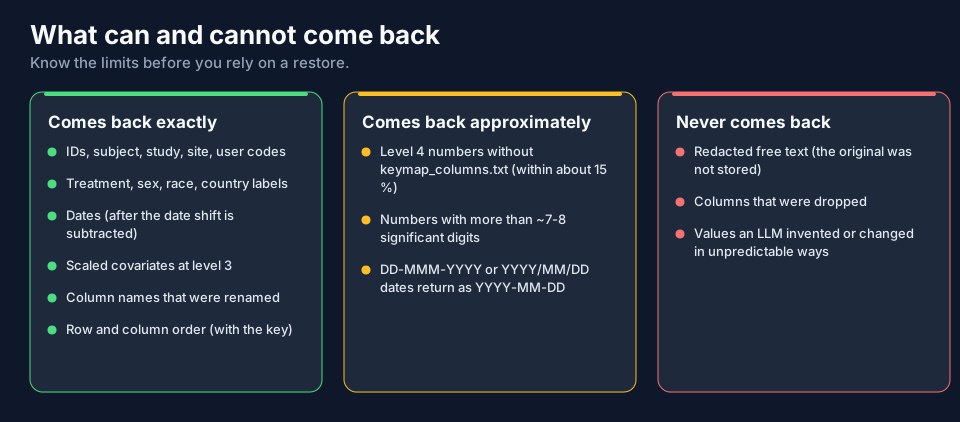
In short: identifiers, labels, dates, scaled covariates, renamed columns and the row order (with the key) come back
exactly. Level 4 numbers come back only within about 15 % unless keymap_columns.txt is available; numbers with more
than about eight significant digits and some date formats come back in a different but equivalent form. Redacted free
text, dropped columns and values the LLM invented never come back.
6. Good habits
- Pick the lowest level that is enough for the audience, and read the warnings. The program warns about kept date columns, e-mail-like text it did not redact, text columns it does not recognise, and rows with the wrong number of fields.
- Use your own seed (
--seed 20261012), and write it in your options file so the run can be repeated. - Keep the key (
keymap.txt, pluskeymap_columns.txtat level 4) somewhere safe and offline. Without it nothing can be restored; with--write-keymap falseit is not written at all. - Do not share anything but
obfuscated.csv(or the*_masked.csvfiles) and the prompt file. - Masking is not anonymisation. Rare dates, rare covariate combinations and rare events can still identify a person; the decision to share stays with you and your organisation's rules.
Where to go next
The Using the Program section starts with Getting Started (installing and a first run) and then has one page per command and per group of options.